

How To Replace Oil Filter
When it comes to heating repairs, some jobs are definitely better left to the pros. Is your HVAC unit smoking? It's probably all-time call in a contractor for that one. But minor maintenance tasks, similar irresolute and cleaning the filter on your oil-called-for furnace, tin be accomplished by almost anyone with a wrench and a tin-do attitude.
For optimal performance, most experts recommend you clean or alter the filter at least twice a twelvemonth—once before you first turn on your heater at the outset of the winter or fall, and then over again about halfway through the heating flavour.
That may sound like a lot, but it will seem like no large deal when y'all're done reading through this tutorial. Changing an oil filter is a piece of cake—you probably practise harder piece of work just getting to the office every day. If you're prepared, this task should take you simply a few minutes, compared to a whole afternoon waiting for a heating repairman to evidence up. Here'southward how to do information technology.
Tabular array of Contents
- Plow Off the Electricity and Oil Supply
- Remove the Filter Base
- Make clean the Filter Canister Base
- Add together the New Filter
- Drain Air from the Filter and Turn the Oil Supply Dorsum On
- Clean the Pump Strainer (If You Have One)
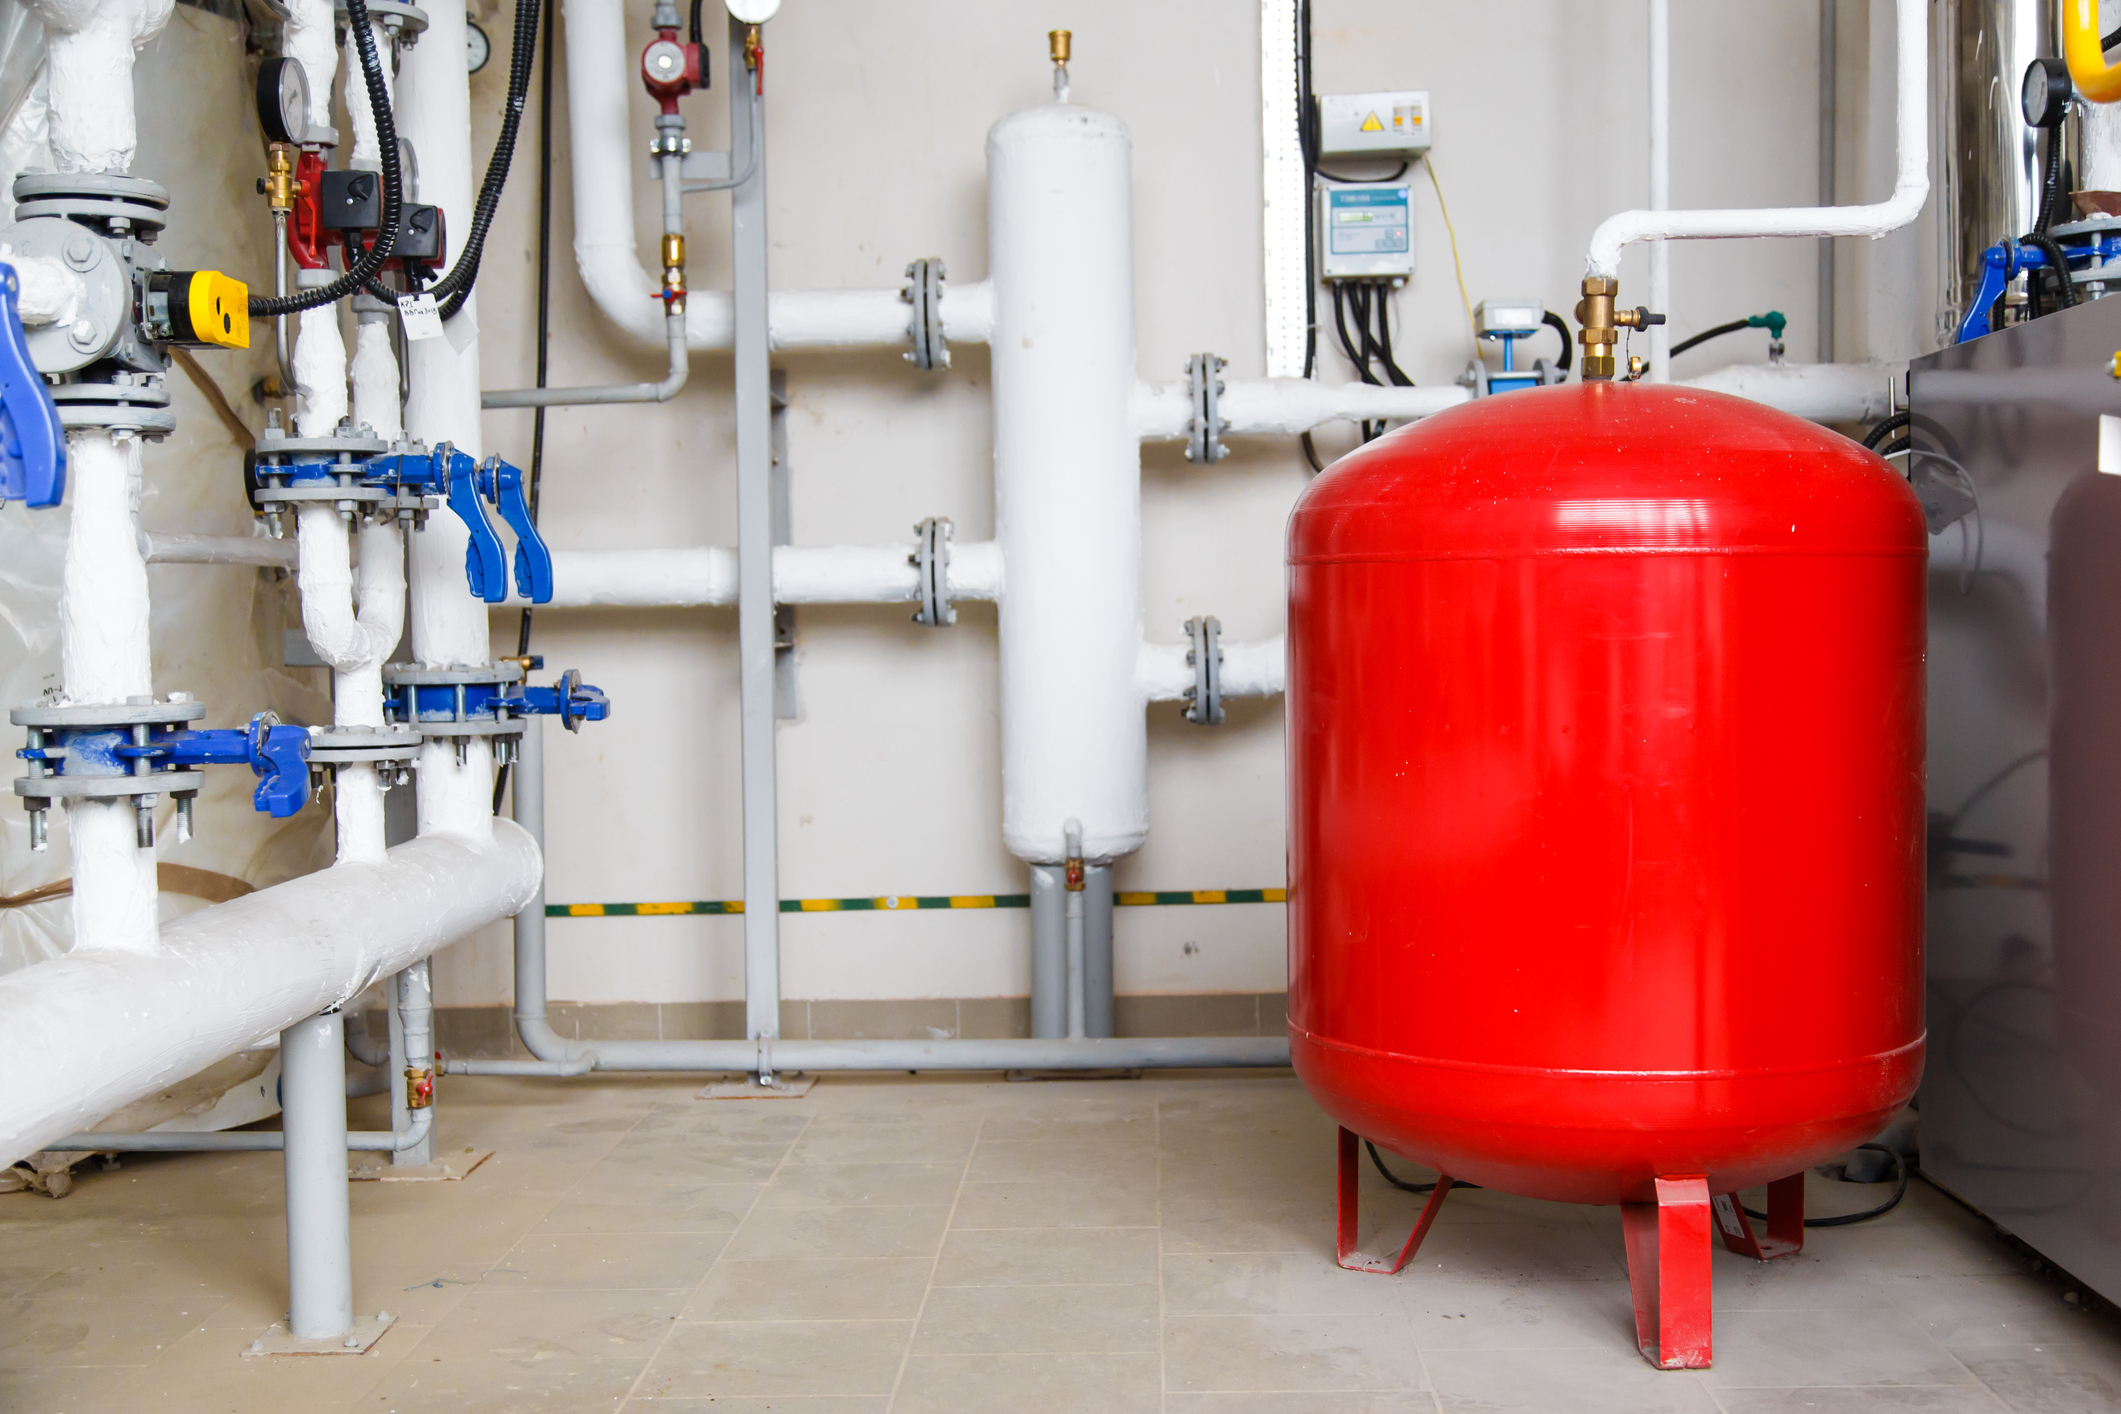
Plow Off the Electricity and Oil Supply
Anytime you piece of work on your heating or cooling equipment—even for minor updates—you should shut off the power going to your HVAC unit of measurement equally a safety precaution. For a filter cleaning, you lot'll need to turn off the oil supply going to the filter as well, for obvious reasons. Typically, at that place will be a shutoff valve located on the oil supply line above the filter.
Even after yous turn off the oil, there may be some leftover in the line and the filter, too, and then place a catch pan or saucepan below the filter before moving on.
Remove the Filter Base
Your filter is covered by a base that detaches from the unit, either by loosening the bolt that holds it in place or just unscrewing the base of operations from the supply line.
At this point, you should be able to remove the one-time filter and either throw it away or have information technology out for cleaning.
Clean the Filter Canister Base
There may exist a buildup of oil and sludge in the canister base and top. Clean this out with a soft toothbrush or a cloth. If it's really dirty, y'all can also soak the pieces in kerosene for a infinitesimal or two and then go to work on them with a soft brush. Follow the same cleaning process if you have a unit with a permanent filter.
Add the New Filter
The filter will usually be made upwards of a cartridge that fits into place in the canister base. Put it into the base, and screw the base straight into the tiptop slice, or utilise the bolt to tighten information technology back into identify.
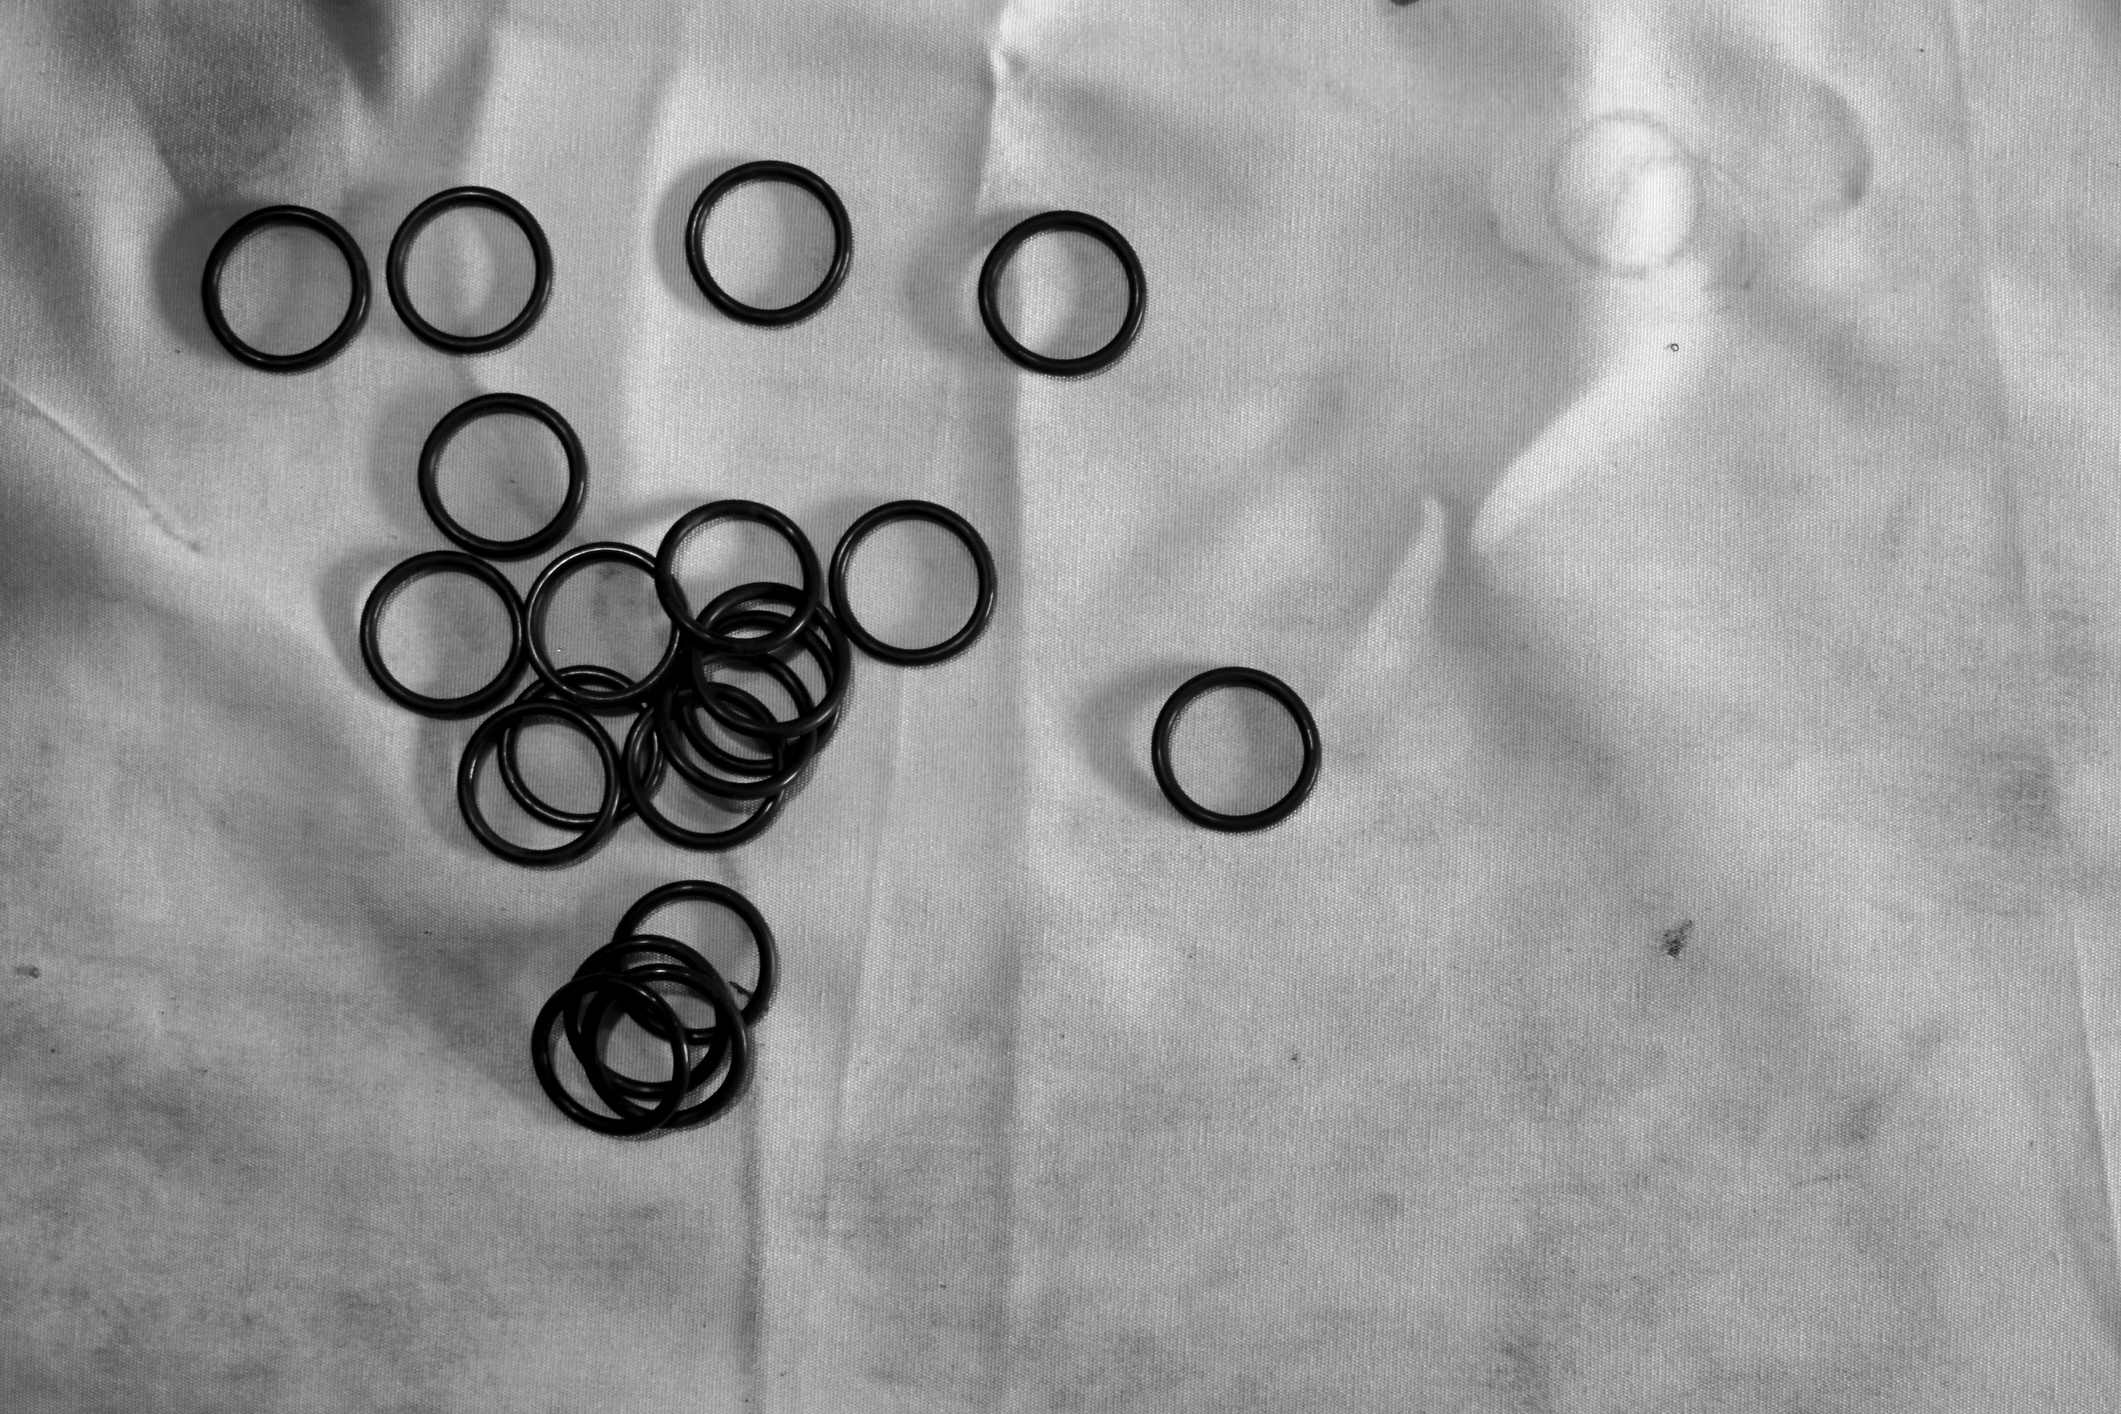
Make sure that the O-ring that seals the connection between the top and base is fit securely in identify when you exercise so. If your cartridge package came with new filters and gaskets, swap these in for the existing ones. If there was no O-ring included, cheque the quality of this office before your spiral it back in. If the older seal looks cracked, breakable, or otherwise damaged, brand certain to buy a new one and install it before screwing the filter back on.
Bleed Air from the Filter and Turn the Oil Supply Dorsum On
Before you lot can restart the unit, you lot need to remove all the air from the filter. You can do this by loosening the bleeder screw that sits on the top of the filter housing.
Side by side, reach over to your oil supply valve and plough information technology on so that oil is flowing to the filter. You should hear a faint hiss as the oil pushes the air out of the filter housing. Once the oil runs out of the bleed area without any air bubbles or gaps, tighten the bleeder screw and wipe the surrounding expanse down with a cloth. Turn the electricity on to your unit, and you should be all set.
Clean the Pump Strainer (If You Take One)
Some units besides have a pump strainer located at the cease of the oil supply line where the filtered oil enters the burner. It's a smart idea to clean the pump strainer when you're changing the oil filter, and so your whole unit will run clean and clear.
To practice then, elevator the cover over the strainer and pull out the wire mesh strainer. Wipe it down with a cloth, or soak it in kerosene as well for a minute or two to loosen any buildup. Scrub with a soft bristled brush, and then wipe it off well. Make sure to check the strainer at the same fourth dimension to ensure that there's no damage to the piece that would warrant a full replacement.
Put the strainer back into place and add together a fresh O-band if necessary. Close the filter cover.
Run across? Non and then difficult, right? The worst role is really the mess, but if y'all're willing to get your hands a petty muddied, you can have an oil filter changed in no fourth dimension—and as a reward for your self-reliance your heater will run more efficiently, and you'll save money, too. That'due south what we call a win-win!

How To Replace Oil Filter,
Source: https://modernize.com/homeowner-resources/hvac/change-oil-filter-home-furnace
Posted by: gaultgrabusereave1955.blogspot.com
0 Response to "How To Replace Oil Filter"
Post a Comment